Monday, December 31, 2012

Zesty Brussel Sprouts


Even though I usually try to find a way to work vegetables into the main dish, if I am lacking, my mother trained me well to make sure I always have a vegetable on my plate in some form.  She also trained me to make my dishes with three things on the plate.  I always feel amiss when I don't follow that rule, but when I'm the only one eating at night it's harder to make more food and know it won't go to waste.  One day my family will be subjected to the same strange habit I was as a kid.  But for now I will remain my mother's partner in crime to try to get my dad to eat more vegetables, and find new recipes we enjoy in the process.

Brussel sprouts aren't most people's favorite vegetable (one of those people being my dad), but they are packed full of health benefits.  Vitamin K, Vitamin C and cancer fighting powers to name a few.  Apparently when they are steamed they also are a great way to lower cholesterol.  To help these health crusaders pass your lips with less fuss, I bring you a recipe my mom brought to the Christmas Eve table at my parents' house this year:

Zesty Brussel Sprouts

Servings: about 6

Ingredients:

1 lb of Brussel Sprouts, stems removed
2 Tbsp of Orange Juice
1 Tbsp of Rice Wine Vinegar
1 Tbsp of Olive Oil
1/4 cup of Low Sodium Chicken Broth
1/4 tsp of Salt
1/4 tsp of Pepper
1 clove of Garlic, minced
1/4 cup of sliced Almonds, toasted (optional)

Directions:

Slice the brussel sprouts thinly and toss with orange juice and vinegar.

Heat the olive oil in a large nonstick skillet over medium heat.  Add brussel sprouts and saute until tender - about 2 minutes.  Add the rest of the ingredients except for the almonds.  Cook for 2 more minutes.
Garnish with almonds and serve.


Wednesday, December 26, 2012

Spinach and Feta Omelet Puffs


Ever since moving to LA I've noticed that brunch is quite the phenomenon.  It might just be an adult thing that I was never a part of before, but I like to think of it as a very "LA" thing to do.  Either way, I have come to love it, but as an assistant on a budget, and as someone with an old roommate who let bottomless mimosa's and a trip to the pet store in search of a fish turn into this adorable little monster:


I've realized I can't spend every weekend at some of the amazing cafe's LA has to offer, no matter how much my taste buds protest.

Instead, I spend some of my Sunday mornings in my own kitchen feeling fancy cooking up cafe style cuisine and pouring my orange juice into wine glasses.


These little tarts are great for a brunch with friends or can be stored in the fridge for breakfast the rest of the week.  Because they are self contained, they make eating and storing them as simple as possible.  My car has the crumbs to prove just how portable they are.  

Spinach and Feta Omelet Puffs

Serving Size:  2 tarts
Servings:  4

Ingredients:

1 container of Crescent Seamless Dough
5 Eggs
1 cup of Fresh Spinach
8 pinches of Feta Cheese
Salt and Pepper to taste
Cooking Spray

Directions:

Preheat oven to 375 degrees.

Boil a pot of salted water.

Spray muffin tin with cooking spray.  Unroll the dough and cut it into eight 5" squares, about the size of your hand.  Press dough into each cup of the tin allowing the four corners to hang over the sides.

Once your pot of water is boiled, blanch your spinach.  Cook for about 15-20 seconds then place spinach in ice water and drain on a paper towel.

Place spinach into each cup of dough.  Mix eggs, salt and pepper together and fill the cups of dough about 2/3 full.  Sprinkle a pinch of feta cheese into each cup and fold the corners over top.  (To spice up the recipe you can used flavored feta, I used tomato basil).

Bake in the oven for about 8-10 minutes or until the dough is golden and the egg is no longer runny.  Remove from tray with a fork right away to avoid over cooking and serve.


Monday, December 24, 2012

Creole Tilapia with Garlic Infused Alfredo


Along with my typical meats that stock my freezer for those times I don't feel like planning ahead, I also usually have some sort of fish.  I try to be healthy and work fish into my diet more, but I'm also on a budget being a recent college grad in LA, so frozen is the way to go, as well as on sale.  It makes its appearance every so often.

This time it was tilapia.  And to my surprise, when I opened the bag, each fillet was individually wrapped and not stuck in a huge frozen blob I had to chisel apart.  Hey, it's the little things in life.

Now, one of my favorite things to pair with tilapia is a mango salsa, but with the warning of salmonella in mangos right now, I was forced to go a different route.  I just googled "tilapia recipes" and found one that piqued my strong desire to visit New Orleans.  Up until now I've just had to settle for my classes about Voodoo and the one restaurant in Downtown Disney I ate at... once.  Baby steps here.

With some minor adjustments to the recipe to accommodate what I had in my kitchen, I give you:


Creole Tilapia with Garlic Infused Alfredo

Servings: 1 (because it's easier to double or triple than halve or third)

Ingredients:

1 Tblsp (approx) of butter or margarine
1 small to medium clove of garlic, minced
Creole seasoning or Old Bay
1/2 cup of Alfredo Sauce
1 Tilapia filet (frozen or thawed)


Directions:

Preheat oven to 400 degrees

Cover a cookie sheet in tinfoil and set tilapia on foil (makes for easier clean up).  Season tilapia with creole seasoning.  Remember it's spicy, so don't put too much on because you will add it to the sauce as well.  Bake Tilapia for about 10 minutes or until it is no longer translucent and flakes easily with a fork.

Meanwhile, melt the butter on low to medium-low heat.  My stove is temperamental, so I ended up browning it, but it worked out anyway.  Throw in the minced garlic and let it cook on low until the garlic softens and is aromatic.  Pour in the Alfredo sauce and keep warm.  Add in some creole seasoning to taste.

This dish goes well over pasta, so while the fish is cooking, boil some water for the pasta if you so choose.

When the fish is done pull it out and top with your sauce and you are ready to go.

One of the most flavorful and simplest dinners I've ever prepared.


Million Dollar Sugar Cookies


Hopefully you aren't sick of Christmas cookies just yet.  But let's be honest, how can you be?  This recipe is one of my family's favorites.  I just made them yesterday and I will be surprised if between the three of us any cookies will be left past Christmas night.

These cookies are easy to make and the recipe makes a lot of them so they are perfect any time of year, but when they are rolled in green and red sprinkles you can't help but feel festive.  Even when you are like me and celebrating Christmas in 70 degree weather in Houston, TX with no snow in sight.

So as long as you haven't already gained numerous pounds from all the other treats this season has undoubtedly brought, and are up for some more baking, share the spirit with me and these delicious cookies.  Add some Michael Buble Christmas music and it will be just like my kitchen:

Million Dollar Sugar Cookies

Servings: about 3 dozen cookies.

Ingredients:

1 cup of Sugar
1/2 cup of Butter
1/2 cup of Shortening
1 Egg
1/2 tsp of Vanilla Extract
1/4 tsp of Almond Extract
2 cups of Flour
1/2 tsp of Baking Soda
1/2 tsp of Cream of Tartar
Red and Green Sprinkles or extra 1/3 cup of Sugar

Directions:

Heat oven to 350 degrees.

In a large bowl, combine 1 cup of sugar, shortening and butter.  Beat until light and fluffy.

Add vanilla extract, almond extract and egg.  Blend together.  Add flour, baking soda and cream of tartar.  Mix well.


Shape the dough into 1 inch balls.  Roll balls in sprinkles or extra sugar.  Place on an ungreased cookie sheet about 2 inches apart.  Flatten balls to about 1/8 inch thickness.

Bake for about 7-12 minutes or until the edges of the cookies are light golden brown.  Cool 1 minute before removing from cookie sheet.

Happy Holidays from my home to yours!

Monday, December 10, 2012

Apple and Cheese Crepes


I was always weary of crepes because I was told they were hard to make.  I remember my mom always having trouble burning pancakes while I was growing up; these things were bound to be a hassle.  Or so I thought.  Crepes couldn't be easier to make.  I'm not sure if I'll ever make pancakes again after making these babies.

Don't ask me how I came up with this idea of apples and cheese in a crepe because literally I think I was just sitting in bed dreaming about food as usual and it just snuck right in there.  My original idea was apples and ricotta, but when I pulled my ricotta out of the fridge it smelled oddly sweet, which made me a bit hesitant to use it.  Instead I grabbed my cream cheese I was saving for a different apple creation.  The world was looking out for me that morning because when I made them again with ricotta they were good, but not quite as good.  The cream cheese has a sweetness that works well with the apples.

The photo you see above is the ricotta version that I topped with peanut butter to add that flavor that was missing.  Caramel or peanut butter would go well with either version, but the cream cheese one doesn't really need it.  What's great about crepes is you can really add whatever you like and it will probably taste good.

Apple and Cheese Crepes

Servings: 2-4

Ingredients:

    For crepes:
        1 cup of Flour
        2 Eggs
        1/2 cup of Milk
        1/2 cup of Water
        1/4 tsp of Salt
        2 Tbsp of Butter, melted

    Filling:
        1 medium Apple or 2 small (I used Green Dragon Apples because they are my favorite)
        1/2 Tbsp of Cinnamon
        1/2 Tbsp of Brown Sugar
        Dash of Lemon Juice
        4 Tbsp of Cream Cheese (approx.)
        1/4 cup of Walnuts
        Cooking Spray

Directions:

Heat two skillets over medium heat.

Combine the flour and eggs, whisking together.  Slowly whisk in the milk, water, salt and butter.

Coat one skillet with cooking spray and pour in just enough batter to lightly coat the bottom.  Tip pan to spread out the batter.  Once it reaches the sides let cook for about 15-20 seconds or until the liquid is no longer able to run.  Flip over and cook for another 20 seconds.  Remove from heat and keep warm.  Continue this until all of the batter is used.  It makes about eight crepes, but I usually only have enough filling for six.  If I happen to have self restraint that night I save the extra, otherwise I eat them as I cook.

Meanwhile, slice the apples thinly and cook in skillet.  Top with lemon juice, cinnamon, brown sugar and walnuts.  To crisp the apples a bit add a little bit of butter, but I like mine soft.  Cook for about 3-4 minutes.  Until they are soft but not mushy.

Top the crepes with a dollop of cream cheese and a few slices of the apples and walnuts.  Roll and serve.

If you like a bit more sweetness, drizzle carmel or peanut butter on top.


Wednesday, December 5, 2012

Flank Steak Salad with Zesty Vinaigrette


Most people start exercising after January 1st because of New Year's resolutions.  I apparently start right before the holidays and will probably stop once January 1st rolls around.  I like to be healthy, and who doesn't wish they had a six pack, but I just do not enjoy exercising.  I'll take classes like Zumba and Hip Hop because they are fun and I don't realize I'm exercising, but if you ask me to run, I will whine like a four year old.  I need something to distract me from the voice in my head saying "This isn't fun. I'm tired.  This is too hard.  When are we done?  Wouldn't you rather be vegging out on the couch with a tub of ice cream?"

Every once in a while though, I get motivated for like two weeks to start exercising again and to try to be healthy.  That is until I get home late one night and all I want is In n Out, then it's a slippery slope.  Right now I'm in work-out and eat healthy mode, which is great right before I go home for two weeks over the holidays and lay around on my parents' couch for 8 hours a day because that's all I want to do. Maybe I'll get some running in if I get chased by one of Texas' wild hogs or the mountain lions that roam our neighborhood.  Maybe my company will make a show about extreme exercise situations then.  Dibs not being the actual host of that one.

Anyway.  Since I'm exercising, my mind gravitates towards foods that are better for you, like salad.  I know, not the most exciting thing, but trust me, this one is a good post-work-out meal and the dressing will just make you feel good because it's zesty and flavorful, which means less is needed, so less calories, which means you don't completely ruin your work-out.   We all win.

I really wanted to add mushrooms to this salad, but alas, my mushrooms always go bad before I use them.  So I threw in the less healthy, but great tasting Tomato Basil Feta Cheese.  Who am I kidding?  That was going to go in anyway.  I just can't do a salad without cheese.

The dressing will go well on anything lighter tasting, so experiment with your favorite veggies.  I'd stay away from earthy flavors like beans and squash, but even those could work if that's what you like.


Flank Steak Salad with Zesty Vinaigrette

Servings: 2

Ingredients:


2 Tbsp of Dijon or Stone Ground Mustard
Just over 1 Tbsp of Lemon Juice
3 Tbsp of Olive Oil
Fresh Parsley, finely chopped
Black Pepper
Baby Spinach
Onion slices
White Cap Mushrooms
Feta or Goat Cheese
1/2 lb of Flank Steak
Spices to season steak (I used cumin, salt and pepper)

Directions:


Season your steak.  Cook the steak in a pan on medium heat.  My secret to adding flavor to steak is to throw in a little bit of Sherry Cooking Wine while cooking.  I also do this whenever I cook mushrooms or spinach, it really amps up the flavor without overpowering it.  Cook steak to desired doneness, but don't over cook or else it will be tough.


In a bowl, combine mustard, lemon juice, parsly and pepper.  Whisk in the olive oil.

Cut up steak and veggies and top the spinach with meat, veggies and cheese.  Drizzle on dressing.

I had a side of homemade Black Bean Chips and Yogurt Dip with this, but that post will be up later this week.


Sunday, December 2, 2012

Sweet Potato Gnocchi


My roommates look at me with disgust most nights because of the types of foods I like to cook with.  I tell them it's just too hard not to cook with all the things they don't like.  They aren't that picky, I just love the veggies that they seem to hate, like sweet potatoes.  Oh well.  More for me.

This has got to be one of my all time favorite dishes.  I mean, I knew I liked sweet potatoes, but I never knew I could like them this much.  I make a full batch of these and eat them all week long.  I even get a bit sad when I reach the bottom of the batch because I never seem to get sick of them.

I make this recipe maybe every other month because I like it so much, but not enough that I want to spend all the time necessary to make the full batch.  Warning: This is a bit time intensive.  With that being said, it's probably only an hour, but it's a constant hour of preparing, not one of those let it sit for an hour while I watch tv kind of preparation recipes.

The gnocchi themselves are packed full of cheesy goodness, but I love to top them with Alfredo sauce and thyme because you can never have too much dairy.  I mean maybe if you are attempting that whole chug a gallon of milk challenge, but that's a different story.  You can top this gnocchi with really any kind of your favorite sauce and it will be good, but it does go best with a creamy type.

Sweet Potato Gnocchi

Servings: 4

Ingredients:

2 large Sweet Potatoes
3/4 cup of Ricotta or Cottage Cheese
1/2 cup of grated Parmesan Cheese
1 Tbsp of packed Brown Sugar
1 tsp of Salt
1/4 tsp of Nutmeg
2 cups of Flour, plus more for dusting

Directions:

Microwave sweet potatoes until soft.  About 6 minutes on each side.

Remove the flesh and mash.  Combine with cheeses, brown sugar, salt and nutmeg and beat until combined.

Next, add the flour, about a 1/2 cup at a time, until the dough begins to form.

Turn dough out onto floured surface and divide into four parts.

Roll each part into 1-inch thick ropes.  Cut the rope into 1-inch pieces and boil the gnocchi for about 4-5 minutes or until they all begin to float.

Top with sauce and spices and enjoy.


My version of a holiday treat.


Tuesday, November 27, 2012

Herb-Crusted Pork Loin and Roasted Apples


Growing up I remember always dreading the nights that my dad got to choose what we ate for dinner because I always knew exactly what he was going to say.  Pork chops and apple sauce.  And he always said it like he was a 1920's gangster.  I'd give my mom this pleading look in hopes she wouldn't listen to him, but I guess when you're married for over 20 years you have to listen to your spouse once in while.

She would try to make the pork chops interesting with bbq sauce because she was as unexcited about pork chops as I was and still am, but my dad is a purist and doesn't like messing with what he knows he likes.  He will only ever eat vanilla ice cream with chocolate syrup.  Not an adventurous eater that one.  So every once in a while my mom and I endured a boring dinner just to please my dad.

Ever since I've started cooking for myself I have avoided pork like the plague.  Unless it's carnitas or pulled pork, I'm just not interested.  However, this one time I decided to pay homage to my dad's tastebuds and tried a bit more sophisticated version of his favorite dish.

Herb-Crusted Pork Loin and Roasted Apples

Serving Size: 2 Servings

Ingredients:

2 Pork Loin filets
2 medium Apples, sliced thin
1 Tbsp + 1 tsp of Brown Sugar
1/4 tsp + 1/2 Tbsp of Cinnamon
2 tsp of Cumin
1/2 tsp of Cayenne
1 tsp Cilantro
1/2 tsp of Thyme
1 - 2 Tbsp of Fresh Parsley
1 cup of Walnuts
2 cloves of Garlic, minced
1/2 of a small Onion, chopped
1 Tbsp of Oil or Butter
1 large Egg
1 Tbsp Lemon Juice
Salt and Pepper to taste

Directions:

Preheat oven to 450 degrees.

Lay apple slices on the bottom of a baking dish drizzle with oil and top with lemon juice, 1 Tbsp of Brown Sugar and 1 Tbsp of Cinnamon

Heat oil or butter over medium high heat and saute onions and garlic until soft and aromatic.

In a food processor or blender pulse the walnuts until fine.  Combine with onions, garlic, and parsley.  Pulse until mixed up.

On a plate combine all of the spices and rub into meat.  Brown the pork loin in the pan until just golden.  Dip in egg and cover with walnut crust.

Place on top of apples and bake until 160 degrees.  About 20 mins.


Sunday, November 25, 2012

2012 Stuffing-Off Challenge


Thanksgiving is all about friends, family, and gratefulness.  But what would an American tradition be without a little gluttony?

This year since I was in charge of the stuffing, I made it a competition between the old and the new.  Check out both recipes we had at our feast and let me know which one you would have chosen to win in the comments.  Also, if you have a favorite stuffing recipe you'd like to share, please put it in the comments.


VS


Mom's Traditional Stuffing - Stuffing Challenge Winner


This was my first Thanksgiving that I hosted and I was in charge of the turkey, stuffing and vegetables. I couldn't decide which stuffing I wanted to make because I missed my mom's stuffing last year, but also ended up having my favorite part of the meal be the Apple, Sausage and Walnut Stuffing we had.  Since I just recently started liking stuffing, I didn't want to miss out on either.  So since this year I was in charge of it I decided that I didn't have to decide.  Instead I made a half size amount of both and decided to have a stuffing-off.

Mom's Traditional Stuffing was easily the crowd's favorite.  It also quickly became the first of the leftovers to vanish.  Can't break tradition in this apartment I guess.  That is why it gets the coveted "Stuffing Challenge Winner" spot on the blog, but don't miss the runner up's recipe on the next page.

The amount below is the full size amount, but it can easily be cut in half.

Mom's Traditional Stuffing

Serving Size: 10-12 Servings

Ingredients:

24oz of Day Old Bread

2 cups of chopped Onions
2 cups of chopped Celery
2 Tbsp of Butter
1 large grated Carrot
3 Tbsp of Poultry Seasoning
Thyme, Marjoram and Rosemary to taste (optional because the poultry seasoning contains this)
Turkey Gizzard finely chopped
2 cups Chicken Broth or Giblet Stock (directions below)


Salt and Pepper to taste
Fresh Parsley

Directions:


Tear the bread into 1 inch pieces and let sit over night if you can.


Preheat oven to 350 degrees.

Melt the butter in a skillet on medium-high heat and saute onion and celery until tender, about 5 minutes.  Pour over bread in a large baking dish.  Add grated carrot, gizzard, parsley and spices to taste.

Slowly pour in chicken broth or giblet stock and allow bread to absorb the liquid.  Mix everything together with your hands.  Keep adding broth or stock until the bread is fully saturated, but not dripping.

Cover with tinfoil and bake for about 1 hour or until the stuffing reaches 165 degrees.  In the last 5-10 minutes, uncover and allow the top to brown.


GIBLET STOCK RECIPE

4 cups of Chicken Broth
1 rib of Celery
1/2 of a Carrot
1/2 of a Yellow Onion
1 Bay Leaf
Chicken Heart, Liver and Neck

Directions:

Simmer all of the ingredients together in a covered pan for about 2 hours.  Separate liquid and add to stuffing.


Sausage, Apple, Mushroom, and Walnut Stuffing - Stuffing Challenge Runner Up


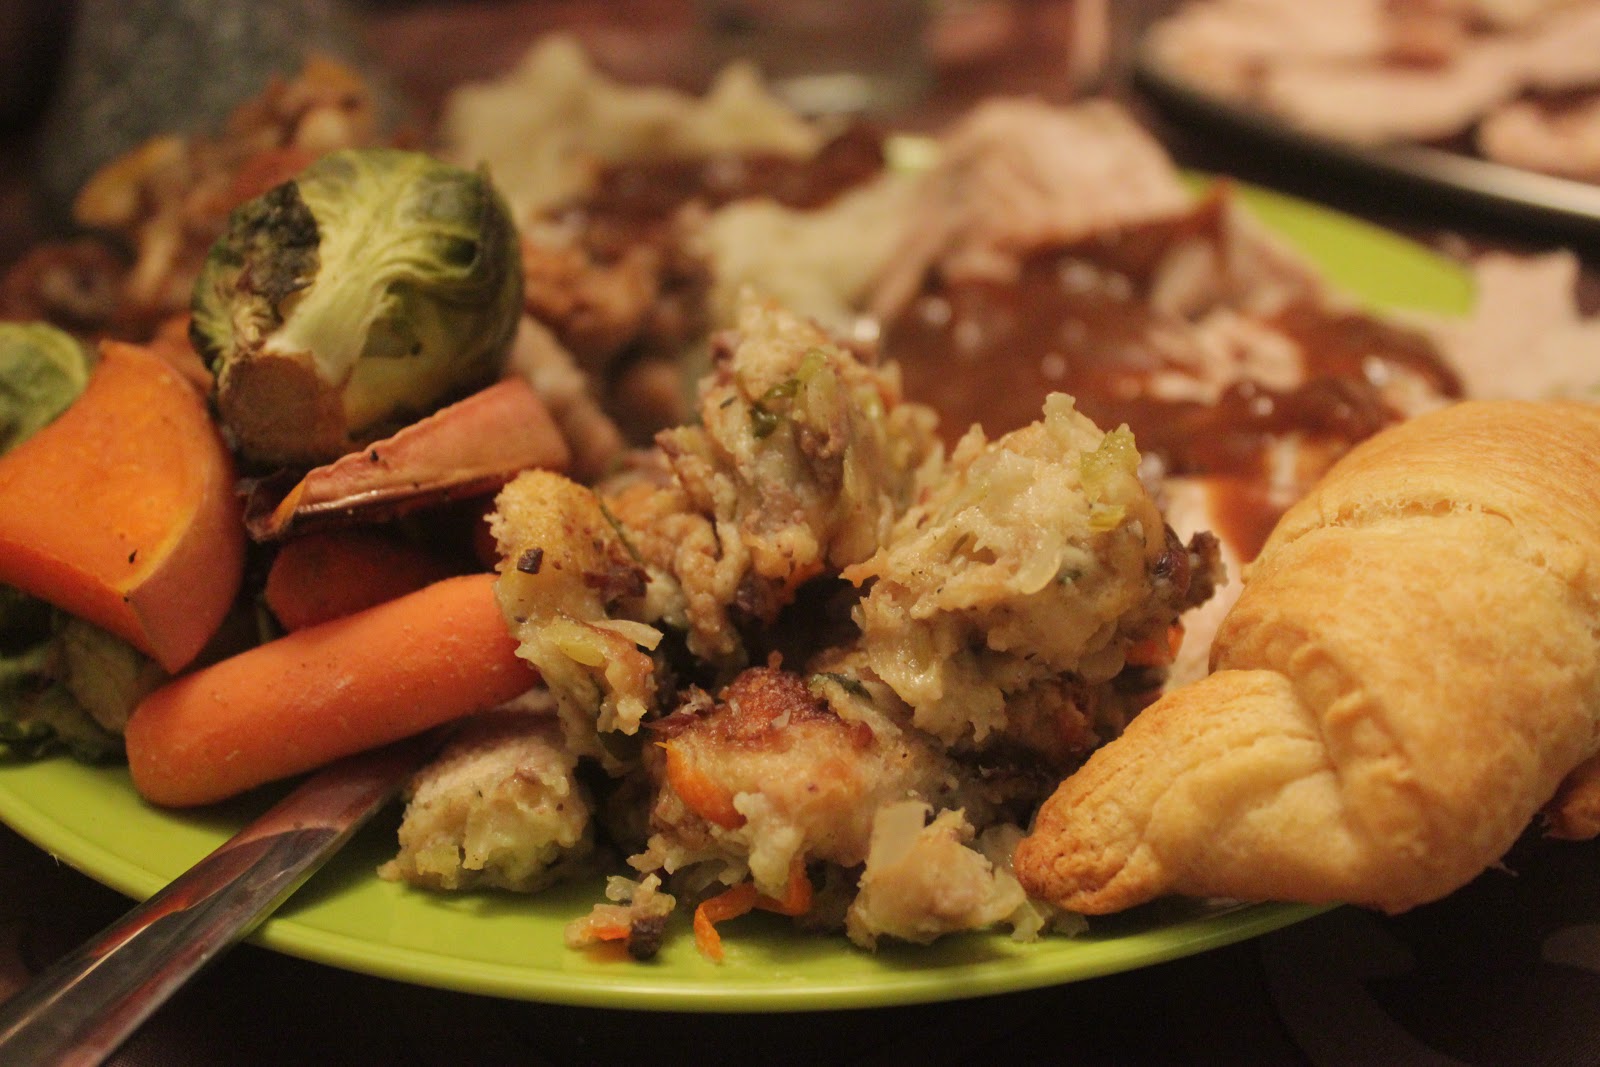
Stuffing has recently become my favorite dish at Thanksgiving.  I used to hate it.  I think I was insane as a child.  Last year I had my first LA Thanksgiving and was very grateful for everything that day brought, including an Apple, Sausage, Walnut and Raisin stuffing.  I was a bit weary at first when I helped make this dish, but as soon as it came out of the oven it took all of my strength not to eat it all before we even brought it to the feast.

Out of every type of food on our table that day, I was surprised to find that I liked this new kind of stuffing the best.  It was because of that miracle that I knew this year I had to make it, but with a few twists.  However, I also couldn't forget that I was sad I wasn't having my mom's traditional stuffing last year.  What was a girl to do?  I decided that a "Stuffing-Off" was in order and made half amounts of both kinds of stuffing and let the crowd choose their favorite.  

Sadly, my personal favorite came in second, with only me and one other person choosing this recipe over the other, but tradition is tradition for a reason.  However, I think the new tradition will have to be both kinds of stuffing every year.  

Even though it is the runner up, below is the full amount for my favorite kind of stuffing.  (I only made half for our dinner)

Sausage, Apple, Mushroom, and Walnut Stuffing

Serving Size: 10-12 Servings

Ingredients:

24 oz of Day Old Bread
2 Tbsp of Butter
2 cups of chopped Onions
2 cups of chopped Celery
1 pound of Italian Sausage
2 packages of Mushrooms (white or portabella)
2-3 medium Apples, chopped (I used Green Dragon Apples)
3 cloves of Garlic, minced
2 tsp of dried Thyme
2 tsp of dried Sage
1 cup of Walnuts
1 1/2 cups of Apple Cider
2 cups of Chicken Broth


Directions:

Break up the bread into 1 inch pieces and let sit out over night.

Preheat oven to 350 degrees

Melt butter and saute onions and celery until tender, about 5 minutes.

In a separate pan cook the sausage, garlic and mushrooms until fully cooked.

Combine all of the ingredients except for the liquids in a large baking dish.

Slowly pour the apple cider over the stuffing allowing the bread to soak it up.  Finally, slowly add enough chicken broth to fully saturate the bread.  It should be wet, but not dripping.

Cover with tinfoil and bake for about an hour or until the stuffing reaches 165 degrees.  For the last 10-15 minutes, uncover and allow to brown on top.  


Wednesday, November 14, 2012

Twice Baked Garlic Sweet Potatoes

So I'm still not 100% sure what the difference between sweet potatoes and yams are, but from what I have gathered, sweet potatoes are more common than yams in stores and they vary in color and sugar content.  Either way, these bright spuds are packed with Vitamins A, C and B6.

I could eat sweet potatoes in any form, with butter and brown sugar, as fries, as gnocchi, you name it I'll probably love it, as you will probably gather from my other recipes on here.  This variation though is a throwback to school lunches for me with an adult twist.

School lunches, now that I look back on them, were generally pretty lackluster, but I still found a way to be jazzed about the cuisine most days...  I still need to figure out chicken turnovers... I remember loving twice baked cheesy potatoes.  I haven't had one in years and I figured it was time to bring them back, but with a healthier twist.  You're welcome Mr. Bloomberg.

Twice Baked Garlic Sweet Potatoes

Ingredients:

2 medium Sweet Potatoes
2-3 cloves of Garlic, minced
1/4 cup of Sour Cream or Milk
1 Tbsp of Butter
Olive Oil
Green Onions (optional)
Salt and pepper to taste

Directions:

Bake the potatoes in the oven at 400 degrees for about an hour or until soft.  You can also pop them in the microwave for about 10 minutes, just make sure to poke holes in them with a fork so they don't explode.

Once cooked, slice through horizontally about 1/3 of the way down the potato.  Scoop out the insides into a bowl leaving some flesh in the skin to provide a sturdier base.

Combine insides with garlic, butter and sour cream and mash together.

Rub olive oil on the outside of the skin to help it crisp.  At this point I would put the empty skins upside down in the broiler for five minutes, but this isn't necessary.

Spoon the filling back into the skin and bake in the oven at 350 degrees for about 20 minutes.

To get them a bit crispier, put them back in the broiler for five minutes.

Top with green onions, salt and pepper.


Sunday, November 11, 2012

Starry Inside Cupcakes

I openly admit that I will never root for the Dallas Cowboys.  I will proudly wear my Eagles green in Dallas on game day if I ever get the chance.  However, today of all days happens to be a certain Cowboys fan's birthday, so I bit my tongue long enough to make Cowboy themed cupcakes because it was a perfect opportunity to attempt putting shapes inside cupcakes.  If it hadn't been for the Cowboys' logo being a star, I would have never stooped so low, but since I've been wanting to try this for a while I made an exception.  Oh it's painful just writing this post....

These cupcakes aren't any harder than regular cupcakes, they just take a bit longer and some planning ahead.

I thought the name was clever.  It's a play on "Starry Eyed".  Get it now?  Hey, I had to do something to distract from my treason right now.

Starry Inside Cupcakes

Ingredients:

Cupcake batter made to specifications
Food Dye
Icing

Directions:

Preheat oven to 350 degrees.

Mix up your batter and separate it into two bowls.  1/3 in one bowl and 2/3 in the other.  The 1/3 amount will be used for the star shape, or whichever shape you choose. Get festive.  Dye it the color you choose.  Wilton food coloring will give it a better color rather than liquid food coloring, but you will pay more for the Wilton.  Pour the 1/3 amount into a 9x9 greased glass baking dish.  Bake until just set enough to hold a shape when cut.  About ten minutes, but keep an eye on it.

Use a cookie cutter to make your shapes in the batter.  Remove each piece and set on wax paper.  The batter will be soft enough that you should be able to push some pieces together to make more shapes and not waste so much of the cake.  Put the shaped pieces into the freezer for at least half an hour.  This is so that when they get baked again they won't dry out.

Put cupcake liners in your cupcake pan.  Stand the shapes up in the liners and put a dollop of the other batter on each side of the shape.  Let some pour over top of the shape, but remember it will rise up over the shape, so do not fill more than 2/3 of the way.  Bake for about 18 minutes or until a toothpick comes out cleanly.

Ice and enjoy.  Just try to mark the cupcakes so you know where the shape is so you can cut the cupcakes in half and show off your handiwork.

Tuesday, November 6, 2012

Donkey Tails and Elephant Ears


So I guess I have to do an extra post this week in honor of the election tonight.  I avoid sharing my support for either side as much as I can, but if you are strategic enough, you can get me talking about the issues and figure it out pretty easily.

But tonight, no matter who wins, I can't pass up an opportunity to cook something special.  Even though I think the two party system has run it's course and we should start embracing third parties more, I can't deny that the two people truly in this race tonight are from the Republican and Democrat parties. Because of this fact, I decided to honor both sides of the spectrum and make a dinner of Donkey Tails and Elephant Ears for dessert.  Tonight I get the help of my roommate because I enticed him with fried food.

Warning: This meal is far from healthy, but if your candidate loses, I'm sure some dramatic people (like myself) will like the indulgence.

Donkey Tails and Elephant Ears (Election Night Meal)

Donkey Tails:

Ingredients:

6 Hot Dogs
6 Flour Tortillas
Shredded Cheese or cheese sauce
Chopped Onions
Jalapeños
Olive Oil
Chili (recipe below)
       1/2 of pound ground beef
       1/2 of a white onion
       7 oz of diced tomatoes w/ juice
       7 oz of tomato sauce
       7 oz of Kidney beans
       3/4 cup of water
       1 tsp of chili powder
       1/2 tsp of cayenne pepper
       1/2 tsp of cumin
       1 clove of garlic
       salt and pepper to taste

Directions:

In a large saucepan, brown the ground beef over medium heat along with the onions.  Sauté until browned and drain the excess fat.

Next, add the rest of the ingredients for the chili.  Bring to a boil and reduce the heat to low.  Cover and let simmer for 20-30 minutes. 

Once the chili is finished, heat the hot dogs for about 20 seconds in the microwave.  Then wrap the hot dogs in the tortillas and secure with toothpicks.  Heat oil in pan and brown the tortilla/hot dog.  Cover with cheese, onions, jalapeños, and chili.


Elephant Ears:

Ingredients:

3/4 cup of milk
3 Tbsp. of butter
1 package of dry yeast
1 Tbsp. of sugar
1/2 tsp. of salt
2 cups of flour
Oil for frying (I used vegetable oil)
Cinnamon and Sugar for topping.

Directions:

Combine the milk, sugar, salt and butter.  Heat over medium until butter is melted, but do not boil.  Let cool to lukewarm.  Add yeast and stir until dissolved.  Stir in the flour.

Put the dough in a greased bowl, cover with a damp paper towel and let rise for about 30 minutes.

Pinch off pieces of dough, about walnut size.  Stretch each piece into a thin circle about six inches in diameter.

Fry each circle in oil for about 10-15 seconds.  Turn over and repeat until light brown.  

Drain on a paper towel and top with cinnamon and sugar.

Fall Veggie Flatbread

The week I decided to make this dish, my office had a serious discussion about how LA is not known to be full of great pizza joints.  Now don't get us wrong, they have great dishes that they call pizza, but said dishes are quite different than the New York Style Pizza I know and love from back east.  We decided that they should more adequately be called flatbreads when they look all fancy with their pears, honey and herbs instead of dripping pepperoni and marinara sauce.  Therefore I had to change the name of my post from Pizza to Flatbread.

I don't mind, though, because this dish is a far cry from pizza, but still swirls with a myriad of flavors ranging from sweet to salty to earthy.  Everything fall is about.

What's also great about this dish, is you can make it a quicker dish by buying store-bought dough, or make it totally from scratch and impress your friends with your skills with minimal effort.  I vote for making your own dough, because it gives it a nicer crunchy base, adds a bit more flavor, and isn't nearly as sticky and messy as pre-made dough.  And don't worry about tracking down yeast, I know I didn't want to bother with that, this dough is yeast-free and can easily be whipped together in five minutes from things you probably already have in your cupboard.

Fall Veggie Flatbread

Ingredients:

Dough:
2 1/2 cups of Flour
1 Tblsp of Olive Oil
3/4 cups of Water
1 3/4 tsp of Baking Powder
1 tsp of Garlic Salt (if you use        Garlic Powder or eliminate the        garlic, add 1 tsp of Salt)


Toppings:
1 cup of Ricotta Cheese
1/2 cup of shredded Parmesan Cheese
1/2 of a medium Yam
1/4 of a small Yellow Onion
1 large Carrot
2 Red Potatoes
3 Tblsp of Olive Oil (approx)
1 sprig of Rosemary
2 cloves of garlic, minced
Black Pepper to taste

Directions:

Preheat oven to 450 degrees.

For the dough, combine all of the ingredients, and knead the dough until everything is incorporated.  

*you can make the dough beforehand and let it sit in the refrigerator, just make sure it is covered.*

Spread the dough on a greased baking sheet, keeping it as evenly distributed as possible.

Chop up the veggies and spread them on a baking sheet (I popped the potatoes and yam in the microwave for a few minutes to soften them up for cutting).  Drizzle olive oil over them.  Sprinkle the minced garlic and black pepper on the veggies.  Bake for about 10-15 minutes.


While those are baking, combine the ricotta and parmesan cheeses in a bowl, and then spread the mixture on the dough.  Remove the rosemary from the stem, and sprinkle on the dough as well.  

Remove the veggies and spread them on top of the flatbread.  Bake everything for about 20 minutes, or until the dough turns golden.