Sunday, September 22, 2013

Strawberry and Oats Muffins


Baking was my first love when it came to cooking.  Well, after my "throw in everything I could find in the refrigerator" mac n cheese I made when I was about 13.  I swore it was good.  I'm not so sure anymore.

I took a cake decorating class and instantly fell in love.  I would jump at the chance for bake sales where I could show off my new skills.  My only problem was my short attention span, so half the cupcakes looked awesome, while the rest looked like the cupcakes we were used to at elementary school carnival cake walks.  Not bad, just not as special as I had in mind.  I try to be an artist, I just need to choose my battles, and elaborate cake designs are something I'll have to work up to.  I mean if I could make the cakes that Buddy does on "Cake Boss" I'd be stoked, and I think I could hold my own if I could stand decorating for hours on end, but really I'd just end up eating half the icing in the process.

Anyway, my baking has taken a slight turn recently and become a little less eloquent in appearance and a little more explorational in tastes.  Gone are my Funfetti cupcakes with beds of roses piped on top, and in their place are slightly healthier, but just as delicious muffin recipes.  See my other recent creation Healthier Blueberry Sour Cream Muffins.

Soon I will go back to my cupcake creations. I'm thinking an Old Fashion Bourbon Chocolate cupcake sounds pretty good for Fall, but for now, let's ride this healthy kick for as long as we can.

Strawberry and Oats Muffins

Ingredients:

1 1/4 cups of Old Fashioned Oats
1 cup Plain Yogurt
1/2 lb of Strawberries
2 tsp of White Sugar
1 tsp of Balsamic Vinegar
2 Eggs
1/2 cup of Butter
1/2 cup of Brown Sugar (packed)
1 tsp Vanilla Extract
1 cup All Purpose Flour
1 Tbsp Baking Powder
1/2 tsp Baking Soda
1/4 tsp of Salt
1/4 tsp of Finely Ground Black Pepper
1/2 tsp of Cinnamon

Directions:

Preheat the oven to 400 degrees. 

Prepare a muffin tin with either cooking spray or paper muffin cups.

In a large bowl, mix the oats and plain yogurt together.  Set aside.

Slice or roughly chop the strawberries.  It should come to about 1 1/2 cups.  Place in a bowl and coat with sugar and balsamic vinegar.

In a medium bowl, combine the flour, baking powder, baking soda, salt, black pepper and cinnamon.

To the yogurt mixture add: eggs, melted butter, brown sugar and vanilla extract.  Do not over mix.

Gently add the flour mixture to the oatmeal.  Batter will be lumpy (still don't over mix!)

Gently fold in the strawberries and the vinegar mixture.

Spoon batter in the muffin tin.  Fill to the top.

Bake for about 18 minutes or until the tops are browned.  A toothpick inserted int he middle should come out cleanly.


Recipe courtesy of: http://www.simplyrecipes.com/recipes/strawberry_oatmeal_muffins/

Saturday, May 25, 2013

Italian Monkey Bread


LA has an abundance of farmer's markets, and I've been here almost two years, but I had yet to partake in one.  That is until last weekend.  I don't know what took me so long because it was more magical than I could have imagined.  Items from fresh fruits to seafood to pies lined the walkway.  It was hard to not buy everything.  However, the one stand that won all of my money was the olive oil and mozzarella stand.

Having spent an extended period of time in Spain, I've become a little bit of an olive oil connoisseur.  Nothing beats single estate Spanish olive oil.  It has an earthy flavor that is a bit of an acquired taste, but makes dishes fuller in flavor.  Single estate just means that it is made from a single source rather than a blend of different oils.

Quality olive oil also has a lot of benefits.  My hair never looked better after eating home cooked meals filled with olive oil every night.  It also acts as an anti-inflammatory and despite it's fat content, helps fight obesity along with many other health problems.  Look good inside and out.

Because of my new purchases (two bottles of homegrown olive oil and homemade mozzarella - yummm) I needed to find a dish that would utilize the quality ingredients.  Despite my love of Spain, it's food doesn't get me quite as excited as it's Italian counterparts.  Since I had extra time due to my extended time off I went with something traditional in ingredients, but a little more out of the box in presentation.

If you are cooking for kids, or just want to eat like one, this meal is perfect.  I know I've been on a health kick lately, but I couldn't resist the fun that this dish packs into each bite.

You may be familiar with the original version of this dish that resembles a cinnamon bun.  However, this time I wanted to make it into a savory main dish, so I tried out two different popular italian flavors in order to use my oil and mozzarella.  Half of the ring is bruschetta and the other half is pepperoni pizza.  Appetizer and main course in one.

Italian Monkeybread (Bruschetta and Pepperoni Pizza)

Ingredients: (Double the filling ingredients other than the cheese if only making one flavor)

2 lbs of Pizza Dough (two of those pop open tubes)
24 slices of Pepperoni
6 oz of Mozzarella Cheese
12 Cherry Tomatoes
24 medium Basil Leaves
2 cloves of Garlic, minced
2-3 Tbsp of Olive Oil
Parmesan cheese for topping
Oregano to taste
Salt and Pepper to taste
Marinara Sauce and Balsamic Vinaigrette for dipping

Directions:

Chop up the garlic before starting.  Let it sit until you are forming thedough balls.  Garlic is packed with health benefits, but they only gain these benefits if they sit out for at least five minutes after being chopped.

Pull dough into large marble sized balls and flatten them to just slightly bigger than a pepperoni slice.

Cut tomatoes in half and season with salt and pepper.

Place tomatoes, basil and half of the cheese (divided up evenly) on top of half the dough.  On the other half place the remaining cheese and pepperoni slices.

Heat the oil in a pan and cook the garlic until just beginning to brown.  About 8 minutes

Fold the dough over the ingredients, forming balls.

Take a brush and coat the inside of a bundt pan with the garlic oil.  Place the first layer of dough balls and brush on more oil.  Top with parmesan and oregano on the pepperoni bites and salt and pepper on the bruschetta bites.  Repeat with each layer.

Let dough sit in the fridge for about 30 minutes while the oven preheats to 400.

Bake dough for 30 minutes or until dough is golden brown.

Let sit for an extra 10 minutes before removing from pan.

Serve with marinara and balsamic vinaigrette.


Friday, May 24, 2013

Spicy Coconut Milk Chicken


This dish was inspired by my friend's roommate who made a similar dish for us one night.  Her family is Indian, and I find myself being more and more surrounded by Indian cuisine recently.  I've been adventuring slowly into this realm.  I love the Indian food I've had in the past (meaning the two times I've eaten it) but I admit that I'm a little intimidated by the blend of spices and multiple flavors each dish packs.

This dish was my metaphorical toe in the water of Indian cuisine.  It isn't completely culturally accurate, but for a basic weeknight dinner it will delight your taste buds.

As a bonus, this dish is dairy free because it utilizes coconut milk.  And even though you are probably thinking the same thing I thought - when will I ever use up the rest of the coconut milk? - trust me it is more versatile than you think.  Substitute it for milk in baked dishes like pancakes and it will add an extra touch of sweetness that you won't be sorry about.  Also, check back soon for the recipe for my Mumbai Fish Fry, that will give you one more option.  It's definitely a worthwhile investment to switch things up if you want to go dairy free or just add to your arsenal of flavors.

Spicy Coconut Chicken

Ingredients:

1 lb of Chicken
1 Tbsp of butter
1 Leek, chopped
2 cloves of Garlic, minced
1/4 cup of Onions
1 Tbsp of grated Ginger
2 tsp of Thai Chili Paste
1/2 Tbsp of Curry Powder
Pinch of Cinnamon
Salt and Pepper to taste
1 cup of Coconut Milk
1 tsp of Lemon Juice
3 Tbsp of chopped fresh Cilantro

Directions:

Preheat oven to 375 degrees.

Heat butter in pan.  Saute leek, garlic, onions and ginger until soft.  About 10 minutes.

Coat chicken in Thai chili paste, curry powder, cinnamon, salt and pepper.

Put chicken and vegetables in a glass pan.  Pour in the coconut milk, lemon juice and top with cilantro.

Bake until cooked through.  About 20 minutes.


Thursday, May 23, 2013

Healthier Blueberry Sour Cream Muffins


Being fairly new to cooking, I've been struggling with wanting to cook every interesting recipe that comes my way and wanting to eat healthier.  I even tried a stint of not eating dairy.  That lasted about two days before my love of food got the better of me.  There are just too many delicious things out there to start limiting what I eat.  I'm even getting better with peppers, which used to be my arch nemeses.  Now they are more like that drunk uncle that you would rather not be around, but every once in a while he get's you an awesome gift and he doesn't seem so bad for a little while.

My love of food, though, doesn't cloud my judgement all the time, just some of the time.  I make sure to keep salt and fat in moderation.  I make sure I eat fruits or vegetables at every meal.  And I have lessened my diary intake and tried meatless Mondays.  Knowing the facts and weighing both sides against each other is part of a healthy lifestyle.  This article can be a nice starting point to educating yourself, but make sure to do all your research and don't just rely on one article.  Decide what's best for you.  And for me it was limiting, but not cutting out my dairy and meat intake.  Part of life is being healthy so you can experience more, but at the same time, in my opinion, you can't eliminate other experiences just to be healthy.

And on that note, I give you a healthier recipe for blueberry muffins that uses no butter or oil, and instead uses fat free sour cream and apple sauce.  You won't be able to tell the difference.  Full experience, with more health benefits.  Plus blueberries are a super food, so besides the sugar in these, they are a pretty good win for a breakfast or snack food.

Included is a crumb topping if you want to forgo a little bit of the healthiness factor and make these a little more dessert like.

Healthier Blueberry Sour Cream Muffins

Servings: 24 muffins

Ingredients:

4 Eggs
1 cup of White Sugar, plus one pinch
1/2 cup of Brown Sugar
1 cup of Unsweetened Apple Sauce
1 1/2 tsp of Vanilla Extract
4 cup of Unbleached All Purpose Flour (you can substitute 2 cups for Whole Wheat Flour)
1 tsp of Salt
1 tsp of Baking Soda
2 tsp of Cinnamon
1 tsp of Nutmeg
1 1/2 cups of Fat Free Sour Cream
2 cups of Blueberries
1 tsp of Lemon Juice
Crumb Topping - optional (recipe below)

Directions:

Preheat oven to 400 degrees.

Line 2 muffin tins.

Rince the blueberries and dry.  Then in a bowl mix together berries, lemon juice and pinch of sugar.

In a large bowl beat the eggs while gradually adding the sugars and apple sauce.  Add vanilla.

In a separate bowl mix together the flour, salt, baking soda, cinnamon and baking soda.

Alternate mixing the flour and the sour cream into the egg mixture.  Do not over mix because this recipe already makes a dense muffin.

Gently fold in the blueberries.

Scoop batter into muffin cups.  Fill at least 3/4 full.

For a more dessert style muffin, top with Crumb Cake Topping before baking.

Bake for 15-18 minutes or until a toothpick comes out clean.

Crumb Cake Topping

Ingredients:

2 Tbsp of cold Butter
2/3 cup of Brown Sugar
1/4 cup of Flour
Pinch of Cinnamon


Tuesday, May 21, 2013

Curried Carrot Apple Soup


When I got my wisdom teeth out I was so excited to eat all the mashed potatoes and ice cream I could stand.  I had it all planned out.  Five different flavors of potatoes, plenty of vanilla ice cream to make milkshakes, peanut butter banana smoothies, and sundaes.  It was going to be glorious.  A reason to eat some of my favorite food without feeling guilty about my indulgence.

Well, that got old after the first day.  

That's why I turned to some more creative endeavors while my face swelled up larger than I thought possible.

You always think that you will be different than everyone else, that your face won't swell and you won't be in pain.  That you'll get all the sympathy without any real problems.  Yeah, that almost never happens.  It was a rough week filled with lots of naps, pain killers, and names that ranged from chipmunk to cheeks.  

This soup was the bright spot in it all, both in its color and flavor.  What was also great, was that it allowed me to still work in my vegetables while I could barely open my mouth.  Potatoes and ice cream are great, but they don't pack the most nutritious punch if you know what I mean.

Curried Carrot and Apple Soup

Servings: 4 bowls - 3/4c per serving

Ingredients:

  • 1/2 Tbsp extra-virgin olive oil
  • 1/2 large onion, chopped
  • 1 stalk celery, finely chopped
  • 1/2 tablespoon curry powder
  • 3 large carrots, peeled and thinly sliced
  • 1 large McIntosh apple or two small, peeled and coarsely chopped
  • 1 bay leaf
  • 1 14oz can of reduced-sodium chicken broth
  • Pinch of salt
  • Freshly ground pepper, to taste

Directions:

Heat oil soup pot over medium heat. Stir in onion and celery; cook until the onion is softened and translucent, about 10 minutes.


Stir in curry powder, then add carrots, apples and bay leaf. Stir well over medium heat for 2 minutes.  Add broth and salt. Bring the mixture to a low boil, then reduce the heat to low. Cover tightly and simmer until the carrots and apples are tender, 20 to 25 minutes.

Remove the bay leaf. Using a large slotted spoon, transfer the soup solids to a food processor, adding about 1/2 cup of the broth.  Process to a smooth puree. Pour the puree back into the soup. Reheat and season with pepper. 


Recipe used - http://www.eatingwell.com/recipes/curried_carrot_apple_soup.html

Monday, April 8, 2013

Spring Greens Flatbread


Time for another Meatless Monday post.  This grain called Quinoa has been inspiring me to look at alternate forms of protein lately.  I'm not so sure I could go full vegetarian and not feel like I was missing out on a bunch of possibilities, but I do want to try to be healthier and more environmentally friendly.  Right now my budget doesn't allow me to buy all my foods organic and cage free and all that good stuff, but one of my goals is to get to that point.  For now I'll have to settle on opting out of meat once in a while in order to meet some of those goals sooner rather than later.

This recipe is inspired by my Fall Veggie Flatbread.  However, since Spring has sprung, it needed a face lift.  One of the things I love most about Spring is the blooming and the greenery returning to the world.  I'm glad that in LA it's warm enough all year long that we don't have to spend months with bare trees and ominous weather, but it does take away some of the excitement of the annual rebirth of plants and return of wildlife.

This dish drew as much green from the produce draw as I could find to help replicate this phenomenon.  I also wanted to work in that elusive protein that my mother always worries about when I tell her I am changing up my diet.  So I pulled out my quinoa and dusted off the edamame I had in the freezer to make this probably one of the most well rounded recipes I've eaten in quite a while.  Just between you and me, I've been using a calorie counter website recently to see how well I'm actually eating vs. how I think I'm eating, and I have been lacking in a lot of key nutrients fairly regularly.  Hopefully this recipe will help get me back on track.

Spring Greens Flatbread

Ingredients:

Dough (see Fall Veggie Flatbread for recipe)
1/4 cup of Edamame
1/2 cup of White Onion slices
1/2 cup of Zucchini, chopped
1/2 cup of Asparagus, chopped
1 Tbsp of Olive Oil
Splash of Lemon Juice
Black Pepper to taste
1/2 cup of Mozzarella
1/4 cup of Parmesan
1/4 cup of uncooked Quinoa
1/2 cup of Water
1 Tbsp of Chia Seeds
2 Tbsp of Balsamic Vinegar plus more for dipping

Directions:

Preheat oven to 450 degrees.

 Boil quinoa and water in a small sauce pan.  Once the water boils, turn the heat down to a simmer and cover.  Let cook until all water has been absorbed.

Meanwhile, coat vegetables in olive oil.  Season with pepper and lemon juice.  Spread on a baking sheet and roast in oven for about 10 minutes.

Spread dough onto greased baking sheet.

Once the quinoa is done cooking, mix with balsamic vinegar and spread on dough.  Top with cheese and veggies.

Bake for 20 minutes or until crust begins to brown.


Monday, April 1, 2013

Southwest Quinoa Salad


I know it's been a while since my last post and I apologize.  I've just been in a funk that has kept my motivation in the kitchen on the back burner, but with the first day of April came a new surge of curiosity.

This recipe I found on SkinnyTaste today and decided that a meatless Monday was the way to go. I changed up the recipe a bit to fit my tastes, but there are plenty of variations that would work.  There is nothing better than fresh ingredients, so get creative.

Southwest Quinoa Salad

Ingredients:

1/2 a cup of Dried Quinoa
1 cup of Water
1 15oz can of Black Beans, drained (I use seasoned black beans)
1/4 cup of Red Onion, chopped
1/2 cup of chopped Cilantro
1 cup of Mango, diced
1 can of chopped Tomatoes, drained (not pictured)
1 small Jalapeno, seeded and diced
1 cup of Corn
2 Tbsp of Lime Juice
1 1/2 Tbsp of Olive Oil
1/2 tsp of Cumin
2 cloves of Garlic, minced
1/2 tsp of Chili Powder

Directions:

Combine quinoa and water in a sauce pan.  Bring to a boil.  When the water is boiling, turn down heat to a simmer and cover.  Cook until water is absorbed, about 10 minutes.
Combine the beans, corn, tomatoes, mango, jalapeno, onion and cilantro in a bowl.
Whisk together the lime juice, olive oil, garlic, cumin and chili powder.
Toss the two mixtures together.

Serve, either hot or cold.  I personally like it better warm, it brings out the flavors a bit more.  To do that, put mixture back in the pan and heat on medium for about 2-3 minutes or until heated through.


Saturday, February 2, 2013

French Bread Bruschetta


I grew up hating tomatoes.  I even went so far as to tell people I allergic to them, until I wanted ketchup on my french fries.  I knew that lie wouldn't be convincing for long.  

As I grew older, I tried branching out and found that tomatoes aren't all bad.  I still could never be hardcore and bite into one like an apple, heck, I can't even eat them on my sandwich, but I have found a new love for tomatoes when they are paired with stronger flavors that compliment, well really mask most of, the tomato flavor.  That's when I discovered I liked salsa (and more than just dipping the edge of the chip into the juice) and LOVED bruschetta.  This is a dinner version of my favorite recipe for bruschetta.

French Bread Bruschetta

Servings: 4

Ingredients:

1 loaf of Flaky Bread like french or italian
2 cups of shredded Mozzarella Cheese
15 oz of diced Tomatoes
1 clove of garlic
2 Tbsp of Olive Oil + more for drizzling
1 Tbsp of dried Basil
1 Tbsp of diced Onion (optional)

Directions:

Heat oven to 350 degrees.

Slice bread in half horizontally and drizzle with olive oil.  Toast in oven until slightly golden on top.  

Meanwhile, mix tomatoes, garlic, basil, 2 Tbsp of olive oil, and onions in a bowl.  Taste and adjust seasoning if needed.

Remove bread and top with cheese.  

Return to oven and melt.  About 2 minutes.

Remove bread from oven and top with tomato mixture.

Slice into fourths and serve.


Thursday, January 24, 2013

Apple Strudel Cheesecake Bars


I've been meaning to make these bars since the beginning of December, but with the holidays I just didn't get the chance, but now I am kicking myself for not making them sooner.  They are SO good.  So much for any kind of healthy eating resolutions.

These little buggers were part of my downfall in my quest to limit my dairy consumption.  But what a way to fail!

I'm not usually a big fan of apple deserts, but I have been converted.  They combine the only parts of apple pie I like (the crust and the gooey part of the filling) and mix in one of my favorite ingredients (cream cheese - well I like all kinds of cheese.  I wonder what these would taste like with cheddar cheese on top?  A la MIB 3 style... sorry got lost in a cheesy dream there) to create a sinfully delicious dessert.

I sneak little bites in the morning when making my lunch for work.  I can't help myself.  I'm sure you won't be able to either.

Recipe curtesy of bettycrocker.com

Apple Strudel Cheesecake Bars

Ingredients:

1 pouch of Betty Crocker's Oatmeal Cookie Mix
1/2 cup of firm Butter
16 oz of Cream Cheese
1/2 cup if Sugar
2 Tbsp of Flour
1 tsp of Vanilla
1 Egg
1 can (21 oz) Apple Pie Filling
1/2 tsp of Ground Cinnamon
1/4 cup of chopped Walnuts (Optional)

Directions:

Heat oven to 350 degree.

Spray a 13x9 pan with cooking spray.

Mix together the oatmeal cookie mix and cut up butter until mixture is crumbly.  Save 1 1/2 cups of the crumbs for topping.  Press the remaining crumbs into the bottom of the pan and bake for 10 minutes.

While that bakes, beat together the cream cheese, sugar, flour, vanilla and egg on medium speed until smooth.

In a separate bowl mix together the apple pie filling and cinnamon.

Remove crumb mixture from oven and spread the cream cheese mixture on top.  Spoon apple filling over top of cream cheese and sprinkle with reserved crumbs.  Top with walnuts.

Bake for 35-40 minutes or until golden brown.  Cool for 30 minutes.  Refrigerate 2 hours before serving.

Store covered in the refrigerator.


Tuesday, January 22, 2013

Soyaki Stir-Fry


The holiday pampering my mother did for me has lowered my desire to cook for myself.  Returning briefly to childhood was much nicer than expected.  Don't get me wrong though, I love my life in LA, now if only I could live the movie star lifestyle with private chefs and maids and all that jazz it'd be perfect.  Well... actually... probably not, but it's nice to dream.

Anyway,  when I'm not eating Hot Pockets on my way out the door to the million and one things I've been doing this past week or so, I have been looking for quick fixes to my hunger problem.

This little dish is a healthy version of a college kid's meal.  It's great when you want something tasty and quick that's not terrible for you.  Sorry, pizza, you meet the first two requirements, but you are not a vegetable no matter how much the government tries to tell me you are.

I came up with this dish in the days beginning my LA struggle, and therefore needed to not let vegetables go bad, but also needed to find a way to make them stretch across multiple meal times because a trip to the grocery store only happened once every three weeks.  It still doesn't happen too often, but my fridge looks much healthier than it did back then.

The Trader Joe's Island Soyaki is a little bottle of heaven if you like americanized chinese food that's a little different than the same old soy sauce.  It's great as a sauce like this dish, but even better as a simple marinade for fish or chicken for another quick meal option.

Soyaki Stir-Fry

Servings: 2-3 Servings

Ingredients:

2 packages of Ramen Noodles (you can also substitute brown rice)
1-2 Chicken Breasts, cubed
1 Yellow Squash, chopped
1 Zucchini, chopped
1/2 cup of Mushrooms
3-4 Tbsp of Trader Joe's Island Soyaki

Directions:

Remove seasoning packet from ramen noodles.  Boil a pot of water and cook noodles until al dente.  (If using rice cook all the way through)

In the mean time, cook the chicken thoroughly.  In a separate pan, cook the vegetables until tender.  Turn off heat and add chicken and Soyaki to vegetables.  Mix well.

Stir in noodles and sauté on low for a minute or two.  You may want to add a bit more soyaki, just remember it is full of sodium, so use as little as possible to get the taste you want.


Wednesday, January 16, 2013

Black Bean and Italian Sausage Chili


I love chili.  Not like.  LOVE.  If I could be a judge in a chili tasting contest, I'd drop everything in a heartbeat.  My only problem is I don't like bell peppers, and no matter how much my mother will tell me you can't taste the bell peppers in something, I will detect it.  I can't even eat a slice of plain pizza that was in the same box as a slice with peppers.  Therefore, I find other veggies to throw in and get my heat from spices.  Just a heads up in case anyone wants to throw a chili cook off for me.  Hint hint nudge nudge.

When I first moved to LA I was super concerned about the money I was spending on food.  Like peanut butter and jelly for lunch everyday and only half a glass of orange juice instead of a full one at breakfast kind of concerned.  But I still wanted to cook myself tasty and healthy dinners.  I found that I could keep carrots and celery for long periods of time without them rotting, so those were my go to veggies for everything (as you might be able to gather from some of my recipes that spawned from this time frame in my life).  I would splurge on other kinds of meat every once in a while when my mom made me feel guilty for not getting enough protein, but I was still sick of chicken.  That's when this recipe came to fruition.  I knew I had a can of black beans sitting in my cabinet waiting for a day that I wasn't eating half of my free hoagie at work while I saved the other half for lunch the next day at my other job.  I can be pretty cheap when I want to be.  I also knew that I had divided up my italian sausage splurge in my fridge and needed a way to use it up before it went bad and I decided never to buy that delicious creation ever again because I would die a little every time I had to throw out wasted food.  Yes I am that dramatic.

Therefore internet ideas were sought out and thus the inspiration was found to save my shrinking stomach from it's misery.  It's a combination of all different kinds of chili I've had over the years with whatever I used to have in my kitchen when I first moved out here and was getting my life together.  It's an ever evolving process.

The method I used for this was a way to cook it quickly because I didn't have a crock pot until recently, but if you are so inclined, this can also be simmered on low in a crock pot all day so it's ready for you when you come home at night.  It would probably taste even better that way.

Black Bean and Italian Sausage Chili

Servings: 6

Ingredients:

1/2 lb of Italian Sausage
1 15 oz can of Diced Tomatoes, with juice
1 15 oz can of seasoned Black Beans
1/2 cup of Tomato Sauce
1/2 cup of Chicken Broth
1/2 of a large Carrot
3 stalks of Celery
1/2 of a medium Onion
2 cloves of Garlic
1 Tbsp of Olive Oil
1 Tbsp of Cumin
1 tsp of Oregano
1 tsp of Basil
1 tsp of Cayenne Powder
1/2 tsp of Thyme
1 Tbsp of Chili Powder (if you don't want it too spicy, only put in half)
1 Bay Leaf

Directions:

In a large pot pour in your tomatoes, black beans, chicken broth and tomato sauce.  Cover and let cook on high while you chop your vegetables.

Chop up the carrots, celery and onion.  Sauté with olive oil and minced garlic until tender, about 4 minutes.  Add vegetable to beans along with spices and bay leaf.

Cook sausage until no longer pink, about five minutes, and add to pot.

Cover and cook for at least twenty minutes more.

Serve over rice.


Sunday, January 13, 2013

Seven Vegetable Salad


Right before moving to LA I went to May Fair in Allentown, PA where I watched a man demonstrate kitchen supplies.  Truthfully, I only attended because it promised free food.  He was pretty good at his job, though, because if I had had the money I probably would have bought something.

This was the salad that he made while demonstrating a grater.  He also spent the time explaining to us that by eating this salad 3-5 times a week, you can reduce your chance of internal cancers by 85%.  Now he may have just really been trying to sell us his appliances, but I'd rather err on the side of caution.  I mean eating more vegetables isn't really a bad thing, so I'll stick with that selling point.

If your New Year's resolution is to be healthier, this is a big step in the right direction without too much effort.  Just add your favorite dressing and maybe some tuna for protein and you are gold.

Seven Vegetable Salad


Ingredients:

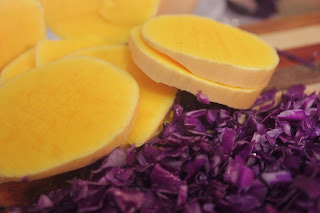
1 large Carrot
3 stalks of Celery
1/2 a medium Onion
2 Yellow Squashes
1 Zucchini
1/4 head of Red Cabbage
1/4 cup of Butternut Squash

Directions:

Shred carrots and cabbage.  Chop the rest of the vegetables into tiny bits.  Mix together and serve.  Store for up to a week.  Top with dressing and enjoy!

Thursday, January 3, 2013

Black Eyed Pea Chili

New Year's is filled with traditions, from the kiss at midnight, to the ball drop, to resolutions, to eating things for good luck.  If you take a step back, all of this might look silly, but it's what makes us human and brings us all together.  I love every holiday because I love to celebrate with friends, family and food.  It's the little things in life that put a smile on your face.  The holidays may never be perfect, but they are always perfectly unique.

Growing up we did the basic things for the holidays, like fireworks for the Fourth of July, costumes for Halloween and presents for Christmas, but I always wanted to really get into the holidays, so as I got older I was in charge of making sure I got the experiences I wanted.  Now as an adult I am thinking up ways to achieve my dreams of the perfectly magical holiday every time one comes around.

This year, it's indulging in the traditions of my surroundings.  Since I'm spending New Year's in Texas, we decided to eat black eyed peas for the supposed good luck they bring.  Hey, it couldn't hurt right?  The only other food traditions I knew of before this was ham for dinner and eating 12 grapes at midnight, one on each of the chimes of the clock (thanks high school Spanish class).  And since chili is a southern favorite and really just an all around delicious food, we went with Black Eyed Pea Chili for lunch the first day in 2013.

Black Eyed Pea Chili

Ingredients:

1 Tbsp Canola Oil

1 Large Onion, diced
2 cloves of Garlic, minced
1 pound Lean Ground Turkey
1 Jalapeno Pepper, diced
1 Tbsp of Chili Powder
1 Tbsp of Cumin
1 15 oz can of Black Eyed Peas, drained and rinsed
1 28 oz can of Tomatoes w/ Green Chilies with juice
1/4 cup of Low Sodium Chicken Broth
Salt and Pepper to taste
Sour Cream for topping
Cilantro for topping

Directions:

Heat canola oil in a large pot over medium-high heat.  


Add the onion and cook until softened, about 3 minutes.  Add garlic and cook 30 seconds more.  

Add turkey and cook until no longer pink, about 4 minutes.  

Stir in jalapeno, chili powder, and cumin.  Cook 1 minute more.

Add black eyed peas, tomatoes and chicken broth.  

Bring to a boil, then reduce heat to medium-low.  Cover and simmer for about 20 minutes, stirring occasionally.

Serve with sour cream and cilantro.